- /
- /
- /
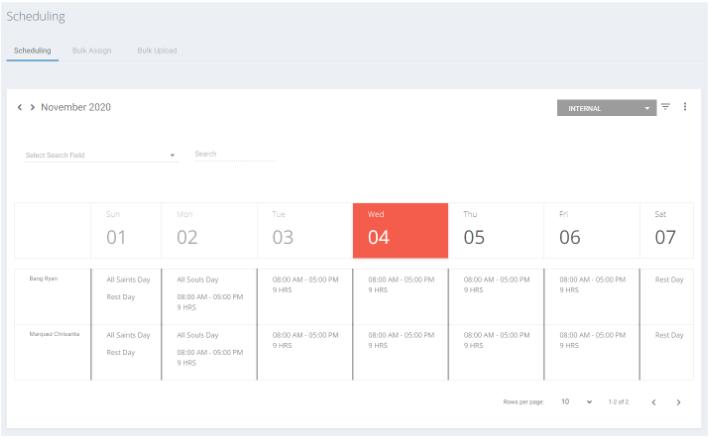
Scheduling Screen
Scheduling Screen
This screen shows the work schedule of the employees and it allows you to manage them. The image below illustrates what it looks like:
As you could see, the Scheduling Screen consists of three tabs that allows you to view and perform certain actions in the Scheduling Screens. The three tabs are:
- Scheduling
- Bulk Assign
- Bulk Upload
The descriptions for the tabs are as follows:
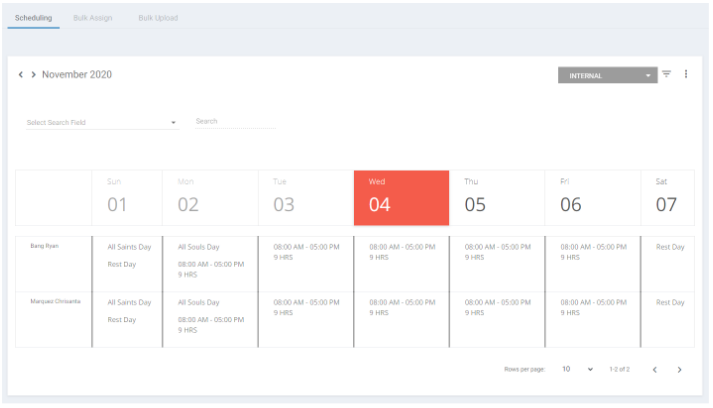
Scheduling tab
This tab allows you to view, edit, download, and manage the schedules of the employees. The image below shows you that this tab looks like:
Scheduling Tab Actions
The Scheduling screen allows you to perform certain actions. The instructions on how to do them are as follows:
How to Download the Schedules
Use the following steps to download a copy of the schedule:
- Click on the ellipsis and select Download Schedules (CSV).
- Follow the download prompts.
How to Set a New Work Schedule for an Employee
Use the following steps to change the working hours of an employee:
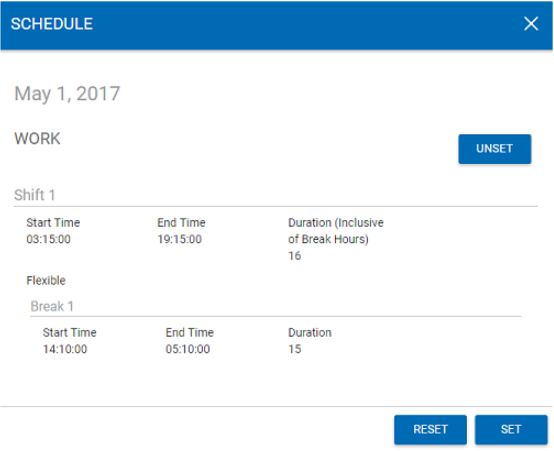
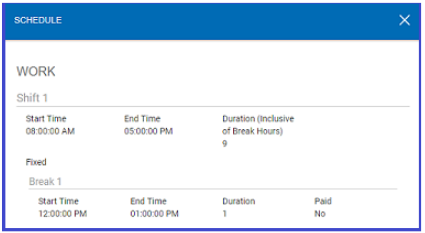
- Click on the schedule of the selected employee. Afterclicking on it, you will see the Schedule pop-up:
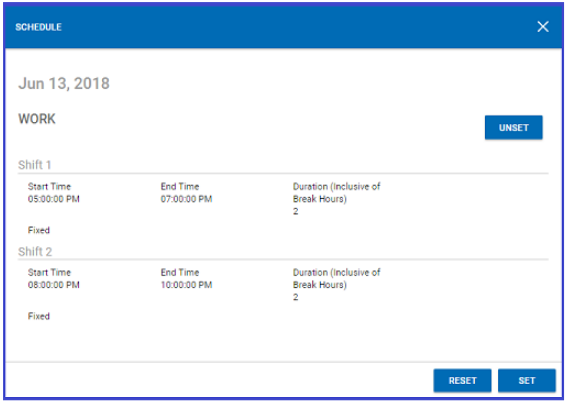
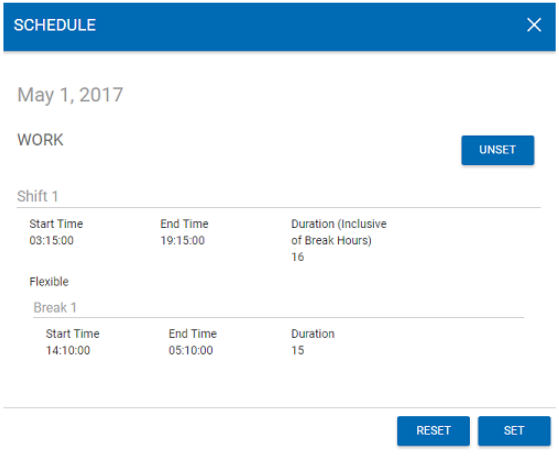
Note: You may end this process by clicking on the “X,” the close button, at the upper right corner of the Schedule pop-up window. - In the Schedule pop-up, click on the Set button. After clicking on it, the Schedule pop-up will change to look like the following:
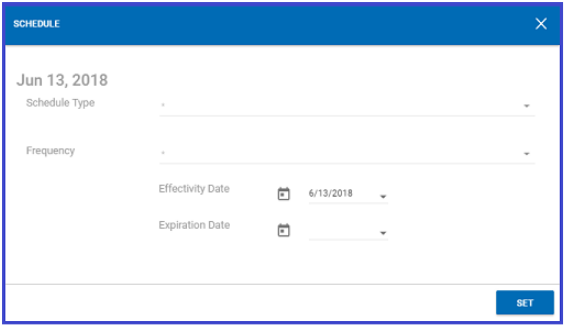
- Modify or update all the relevant information.
Note: Certain fields will be activated and deactivated depending on the selected option in the Schedule Type drop-down menu. - Click on the Set button. After clicking on it, you will see the following confirmation pop-up:

How to Reset a Schedule
Use the following steps to reset the employee schedule:
- In the Calendar View of the selected employee, click on the date that you want to reset. After clicking on it, you will see the following Schedule pop-up window:
Note: You may end this process by clicking on the “X,” the close button, at the upper right corner of the Schedule pop-up window. - Click on the Reset button. After clicking on it, you will see the following Reset Schedule warning pop-up:

- Click on the Yes button to continue. After clicking on it, you will see the following confirmation pop-up

How to Unset an Employee Schedule
Use the following steps to remove the working schedule from the employee record:
- In the Calendar View of the selected employee, click on the date when you want to remove the working schedule from. After clicking on it, you will see the Schedule pop-up:
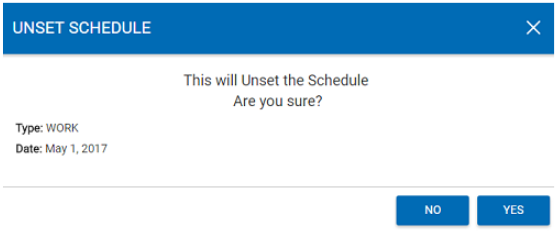
- Click on the Unset button. After clicking on it, you will see the Unset Schedule pop-up:
- Click on the Yes button to continue. After clicking on it, you will see the following confirmation pop-up:

Note: You may end this process by clicking on the “X,” the close button, at the upper right corner of the Unset Schedule pop-up window or at the No button.
Bulk Assign Tab
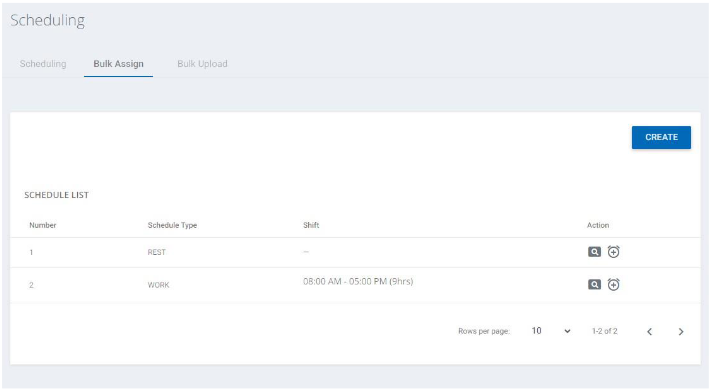
This tab allows you to view, manage, and assign different schedules to more than one employee. The image below shows you what this tab looks like:
The descriptions for the columns and buttons for this tab are as follows:
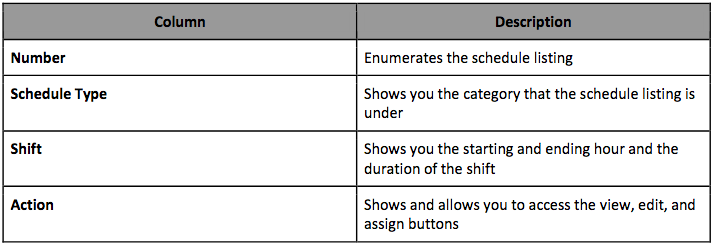
Bulk Assign Action Buttons
This tab consists of four buttons that allow you to perform certain actions. The buttons are:

Create button – Allows you to create a new schedule

View button – Allows you to view the details of an existing schedule listing

Edit button – Allows you to edit, modify, or update the details of an existing schedule listing

Assign button – Allows you to assign an employee or multiple employees to a schedule
Bulk Assign Actions
The Bulk Assign tab allows you to perform certain actions. The instructions on how to perform them are as follows:
How to Create a New Schedule Listing
Use these steps to create a new schedule:
- Click on the Create button. After clicking on it, the Create Schedule pop-up appears
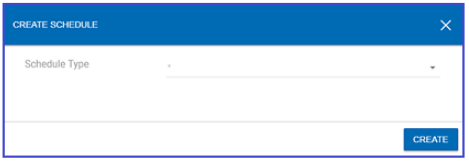
Note: You may click on the “X” button to end this process. - In the Schedule Type drop-down menu, select an option.
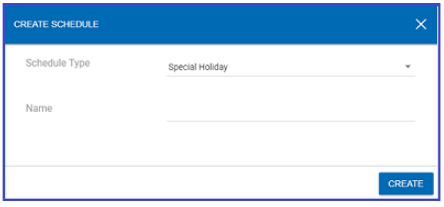
Note the following:- If the Regular Holiday or Special Holiday option was selected the Name field appears:
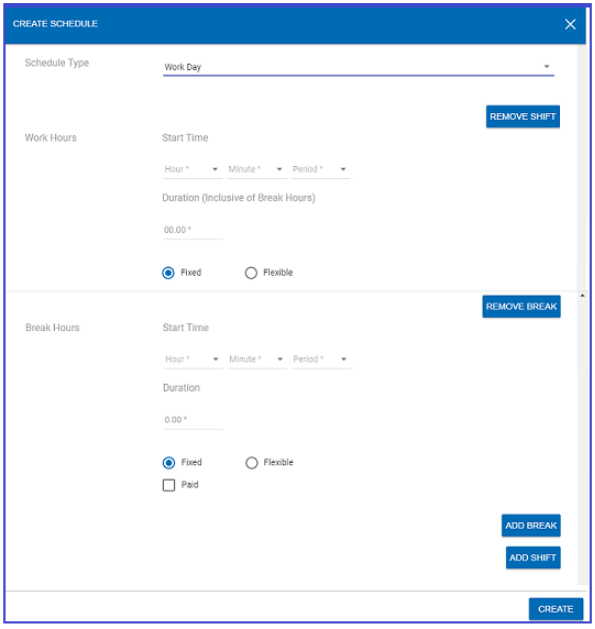
- If the option Work is selected, the Create Schedule pop-up transforms into the following:
- If the Regular Holiday or Special Holiday option was selected the Name field appears:
- Enter or populate all the required fields
- Click on the Create button. After clicking on it, a confirmation pop-up appears.
How to View the Details of a Schedule Listing
Use the following steps to complete this action:
- Visually select the entry that you want to view the details of.
- Click on the View button that corresponds to it. After clicking on it, the Schedule pop-up appears:
Note the following:- The available fields depends on the Schedule Type.
- You may click on the “X”button to close the Schedule pop-up.
How to Edit the Details of a Schedule Listing
Use the following steps to update or modify the Schedule listing:
- Visually select the entry that you want to update.
- Click on the Edit button that corresponds to it. After clicking on it, the Edit Schedule pop-up appears:
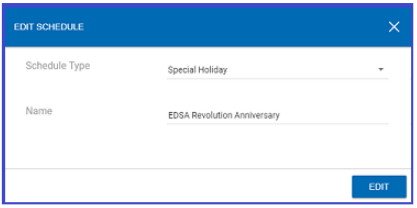
Note: You may click on the “X”button to end this process. - Update all the fields where the change you want to make applies.
- Click on the Edit button. After clicking on it, a confirmation pop-up appears.
How to Assign a Schedule
Use the following steps to assign an existing schedule to one employee or more:
- Visually select the schedule entry that you want.
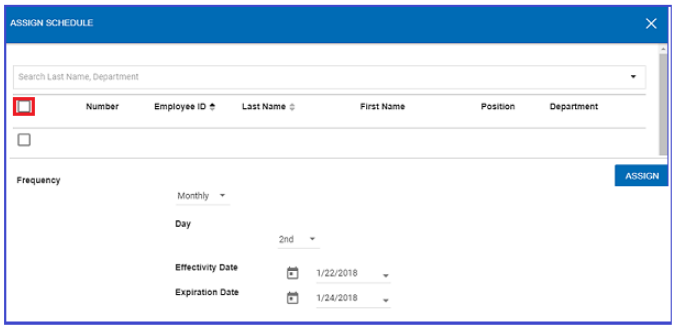
- Click on the Assign button that corresponds to it. After clicking on it, the Assign Schedule pop-up appears:
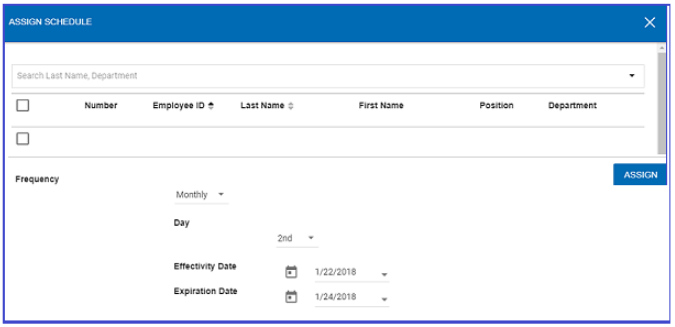
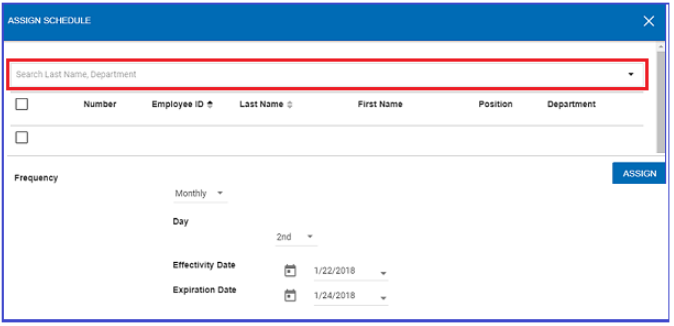
Note: You may click on the “X” button to end this process. - Click on the checkbox or checkboxes of the employees that you want the schedule to apply to.
Note the following:- You may perform a search for the employee by typing his or her last name or the department that she or he belongs to in the search field:
- You may select all the employees by clicking on the Select All checkbox:
- You may perform a search for the employee by typing his or her last name or the department that she or he belongs to in the search field:
- Populate or select all the requiredfield in the Frequency area.
- Click on the Assign button. After clicking on it, a confirmation pop-up appears.
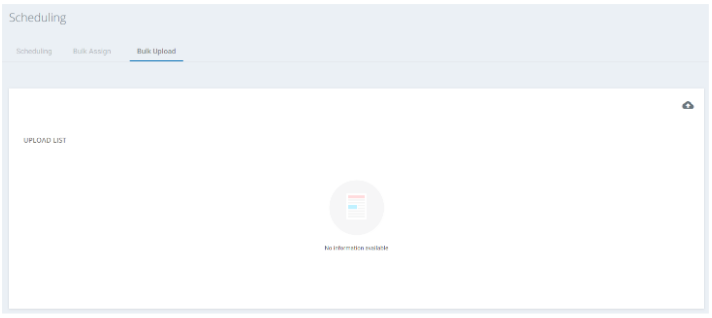
Bulk Upload Tab
This tab allows you to manage and assign different schedules to more than one employee. The image below shows you what this tab looks like:
How to Upload Schedule
Use these steps to upload schedule:
- Go to the scheduling Module and the Bulk Upload tab.

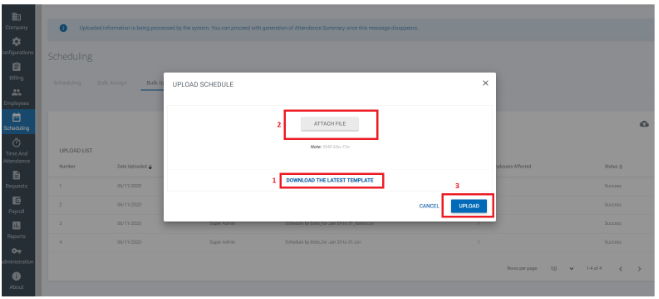
- Click on the Upload Button on the mid right side of the screen
- Click on the “Download Latest Template” to download the latest version of the template. Please note that template is also available in the Configurations module.
- Fill Out the Template with necessary information. Once downloaded, the template also has a guide to assist you in filling it out.
- Click on “Attach” and select the filled out template on your files list.
- Once the file is attached, click on the ‘Upload’ button.
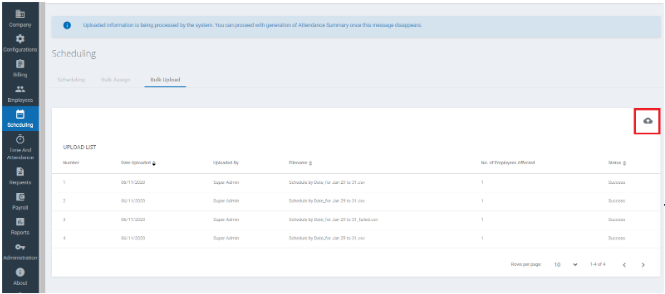
- Once upload is done, you will receive an email for the status. If upload is successful, the schedule uploaded will overwrite any existing schedule of the employee. If upload fails, you will receive an email with attachment. On that file, kindly check out the “Upload Results” column to assist you in correcting your template.